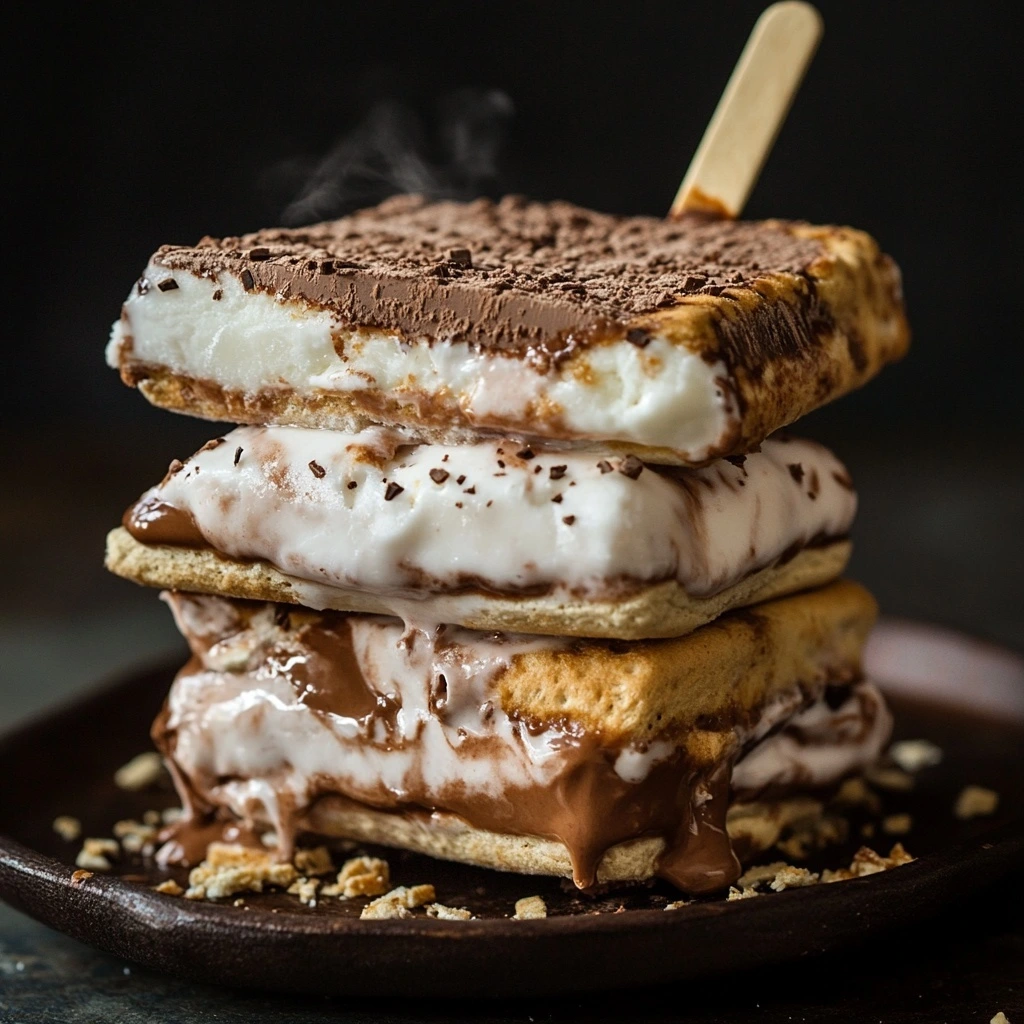
When summer heats up, there’s nothing quite like a nostalgic treat to bring back campfire memories—except this time, we’re putting a chilly spin on it. Meet Frozen S’mores, the ultimate dessert mash-up that blends the gooey, chocolatey magic of traditional s’mores with the refreshing delight of a frozen treat. Perfect for BBQs, picnics, or cooling down on a sunny afternoon, these decadent bites are irresistible.
Ingredients for Frozen S’mores
To make about 12 bars of Frozen S’mores, you’ll need the following ingredients:
-
1 box (14.4 oz) of graham crackers (about 12 full sheets, split)
-
1 package (3.4 oz) of instant chocolate pudding mix
-
2 cups cold milk (whole or 2% for creamier texture)
-
1 container (8 oz) of whipped topping (like Cool Whip), thawed
-
1 jar (7 oz) of marshmallow crème (fluff)
-
4 oz cream cheese, softened
-
1 teaspoon vanilla extract
-
Optional toppings: mini chocolate chips, chopped nuts, or chocolate drizzle
Tools You’ll Need
-
Mixing bowls (medium and large)
-
Whisk or electric hand mixer
-
Rubber spatula
-
9×13 inch baking dish or pan
-
Parchment paper
-
Offset spatula or spoon for spreading
-
Freezer-safe storage container (if prepping in advance)
How to Make Frozen S’mores: Step-by-Step Instructions
Step 1: Line Your Pan
Start by lining a 9×13 inch baking dish with parchment paper, leaving extra hanging over the sides to make lifting easier later.
Step 2: Create the Chocolate Layer
In a medium bowl, whisk together the instant pudding mix and cold milk for about 2 minutes, until it begins to thicken. Gently fold in half of the whipped topping until smooth and fluffy. Spread this mixture evenly into the bottom of the lined pan. Place in the freezer for about 15–20 minutes to firm up.
Step 3: Make the Marshmallow-Cream Layer
In a separate bowl, beat the softened cream cheese until smooth. Add the marshmallow crème and vanilla extract, mixing until well combined. Fold in the remaining whipped topping to create a light, spreadable marshmallow mixture.
Spread this marshmallow layer on top of the firm chocolate pudding layer using a spatula. Be gentle to avoid mixing the two layers together.
Step 4: Add the Graham Crackers
Carefully place full graham cracker halves on top of the marshmallow layer in a single layer, covering the entire surface. Gently press them down just a bit to help them set into the creamy filling.
Step 5: Freeze to Set
Cover the dish with plastic wrap or foil and freeze the dessert for at least 4 hours or until completely firm. Overnight is ideal for clean slicing.
Step 6: Slice and Serve
Once frozen solid, remove the dessert from the pan using the parchment paper overhang. Flip it so the graham crackers are on the bottom and slice into sandwich-style squares using a sharp knife.
Tips for Perfect Frozen S’mores
-
Use full-fat ingredients: They freeze better and offer a creamier, richer flavor.
-
Slice while frozen: For the neatest slices, cut the dessert directly from the freezer and wipe your knife between cuts.
-
Customize the filling: Add peanut butter, Nutella, or crushed cookies between layers for a fun twist.
-
Storage tip: Wrap individual bars in wax paper and store in a zip-top bag in the freezer for quick grab-and-go treats.
Nutritional Information (Per serving, approximate)
-
Calories: 210
-
Fat: 10g
-
Saturated Fat: 5g
-
Carbohydrates: 28g
-
Sugar: 18g
-
Protein: 2g
(Note: Nutritional values vary depending on the brands and variations used.)
Why You’ll Love Frozen S’mores
Frozen S’mores are the perfect no-bake dessert that delivers creamy texture, rich chocolate flavor, and nostalgic charm in every bite. They’re crowd-pleasers at parties, ideal for make-ahead prep, and an exciting alternative to traditional summer sweets. Whether you’re entertaining guests or treating yourself, this recipe is a guaranteed hit.
Conclusion: Try This Frozen Twist on a Campfire Classic
If you’re a fan of the classic s’mores combo of chocolate, marshmallow, and graham crackers, then Frozen S’mores are your dream dessert come true. Cool, creamy, and delightfully indulgent, they’re everything you love about the original—without the fire. Make a batch, keep them in the freezer, and be ready for any summer craving. Go ahead—take a bite out of frozen nostalgia!


